• Who is this girl anyway?

Bite From the Past

~ A modern career girl and mom time travels… in the kitchen. I love history and I love food!

Bite From the Past

Category Archives: entrees

Little House on the Prairie: Fried Chicken

22 Saturday Feb 2014

Posted by Angela Hursh aka Webmastegirl in chicken, entrees, family recipes, Little House on the Prairie recipes, Vintage recipes

≈ 5 Comments

Tags

comfort food, fried chicken, frontier food, laura ingalls food, laura ingalls wilder food, little house on the prairie food, prairie food

This recipe is my homage to a specific food-related memory I have from the Little House on the Prairie television series. Remember the lunch buckets Ma sent to school with Mary and Laura? The props masters chose tin buckets, covered with a piece of cloth. A strange, food-obsessed child, I always wondered what a mother in that era would have packed in a bucket! Then, during one episode, I remember Laura plops herself on the steps of the school house and pulls out… a piece of fried chicken.

In “These Happy Golden Years”, Laura writes about a dinner of fried children served with the first new peas and potatoes of July. The acid-saltwater bath, originally a butchering practice, makes a beautiful brine that adds juiceness to the meat. I used chicken tenderloins because they cook more evenly, but you can certainly use any cut of the bird, with or without bones, including pieces of whole chicken.

You may be tempted to add spices to the flour-don’t. Shake and Bake has sold us all on the false notion that the breading makes the fried chicken. The real flavor comes from the meat and the fat-and this recipe ensures that both of those elements are top quality!

First make a brine with salt and vinegar...

First make a brine with salt and vinegar…

Then cover it with water and let it stand in the frig for at least an hour.

Then cover it with water and let it stand in the frig for at least an hour.

Once the fat is hot in the skillet, dredge your chicken through plain flour and fry!

Once the fat is hot in the skillet, dredge your chicken through plain flour and fry!

KFC doesn't have anything on Ma Ingalls!

KFC doesn’t have anything on Ma Ingalls!

Ingredients

Three to 3 and a half pounds of chicken (if using whole chicken, cut into serving-size pieces)
One tablespoon kosher salt
Two tablespoons apple cider vinegar
2/3 cup flour
Four tablespoons butter
Four tablespoons shortening OR oil (I used olive oil)

Instructions

At least one hour before frying, put the chicken pieces in a large bowl with a cover. Sprinkle the salt and vinegar over the pieces and then cover them with cold water. Place in refrigerator and let stand until it’s time to fry.

Place flour in a pie pan and heat the fat (butter, shortening or oil) in a skillet over medium heat until it’s hot but not smoking. Meanwhile, drain the chicken pieces on a paper towel. When the fat is ready, dredge the chicken through the flour and then place in the skillet. Fry until the pieces are thoroughly browned. My tenderloins took five minutes on each side-larger pieces, especially those with bones, will take longer. If you are doing larger, bone-in pieces, once they’ve browned you can reduce the heat and simmer the pieces with a lid in the skillet another 10-15 minutes until the meat is no longer pink OR you can transfer the pieces to a baking dish and bake them at 350 degrees for 15 minutes until they are cooked through.

The finished product. Delicious!

The finished product. Delicious!

Enjoy!

Advertisements

Black-Eyed Peas, ca. 1969

30 Monday Dec 2013

Posted by Angela Hursh aka Webmastegirl in beans, easy recipes, entrees, family recipes, Holiday recipes, Vintage recipes

≈ 2 Comments

Tags

black-eyed peas, ham and beans, holiday recipes, lucky recipes, new year's recipes, peas and beans, pork and beans

Black-eyed peas

The celebration surrounding the New Year is nearly as heaped in food traditions as Thanksgiving and Christmas. There are individual family classics-in our house, we eat Swedish meatballs, sauerkraut, pork, and Chex mix! And there are classic foods like black-eyed peas. The Foodtimeline.org says black-eyed peas are thought to bring luck because of their round shape, which signifies that the old year has been completed. The dish is often cooked with pork, which is a symbol of prosperity.

I’ve always wanted to make a batch and I found a super simple recipe in the Old House Holiday and Party Cookbook, published in 1969 and written by Emily Dick, owner of the now-defunct Old House Restaurant in Louisville, Kentucky. I’m publishing this in time for you to go out, buy a bag a black-eyed peas and soak them! It’s a really delicious and hearty way to start your new year. It’s a one-pot dish. You can use ham in place of salt pork but I found a store that carries salt pork, which I’m going to use in all my bean recipes from now on-it’s just superior to ham, in my opinion.

It's so simple. You just soak your beans and then dump all the ingredients into one pot!

It’s so simple. You just soak your beans and then dump all the ingredients into one pot!

Ingredients

2 cups black-eyed peas
1/2 pound salt pork
1 slice red pepper or 1/2 teaspoon red pepper flakes
8 cups water, divided
1 chopped onion

Instructions

Soak the beans in four cups of water overnight. Drain just before cooking.
Rinse the salt pork. Put all the ingredients in a heavy pot with a lid and bring it to a boil.
Reduce the heat, and let it simmer until the peas are tender-about two hours.
Enjoy!

Happy New Year!!

Happy New Year!!

Julia Child’s Roti De Porc Poele With Marinade Seche (Casserole Roasted Pork Done in a Salt Marinade)

15 Sunday Sep 2013

Posted by Angela Hursh aka Webmastegirl in entrees, Julia Child recipes, pork, Vintage recipes

≈ Leave a comment

Tags

crockpot recipes, Julia Child, pork roast

Keeping up with our theme of easy Julia Child recipes, this lovely entrée is a cinch.  In her book Mastering the Art of French Cooking, Julia details how to cook the pork in a casserole in the oven. But I did this in a crock pot and it turned out fantastic.  It’s so easy, it’s almost hard to believe it’s one of her recipes!

My delicious pork roast

My delicious pork roast

I think the marinade is the key. Do not skip that step. It’s best to start it as far in advance as possible-I would tell you to go ahead and marinade it two days in advance, flipping it several times a day. The longer it brines, the better the flavor.

Ingredients
• 1 pork roast, boned or boneless
• 1 tsp salt
• 1/8 tsp ground pepper
• 1/4 tsp thyme or sage
• 1/8 tsp ground bay leaf
• Pin of allspice
• 1/2 clove mashed garlic (optional, but I highly recommend it)
• One yellow onion, chunked
• 2 carrots, cut into chunked
• 1/2 cup dry white wine, stock, or water (your preference)

Instructions

As long as two days prior to cooking, mix the salt, pepper, thyme or sage, bay leaf, allspice and garlic in a small bowl.

The marinade in a bowl

The marinade in a bowl

The roast rubbed with the marinade

The roast rubbed with the marinade

Rub the spices all over the surface of the pork. Place it in a covered bowl in the refrigerator. Turn the meat 2 to three times a day. Before cooking, scrape off the marinade and dry the meat thoroughly with paper towels.

Place the pork, onion, carrot, and liquid into the slow cooker. Cook on low for 6-8 hours until the meat is no longer pink and falls apart.

Snug in the crockpot and ready to cook

Snug in the crockpot and ready to cook

That’s it! Julia recommends using the juices left after cooking to make a gravy. To do this, you simmer the juices slowly for 2-3 minutes, skim off all but a tablespoon of the fat, smash the vegetables and add them to the juices, boil rapidly until it’s reduced to about a cup of liquid, then strain.

The finished product!

The finished product!

Bon appetite!

Brown Fricassy of Lamb, ca. 1764

13 Tuesday Aug 2013

Posted by Angela Hursh aka Webmastegirl in easy recipes, entrees, lamb, old recipes, Vintage recipes

≈ 2 Comments

Tags

easy recipes, lamb fricassee, lamb fricassy, weeknight dinners

One recent weeknight, I was rushing through the grocery store, without a plan in mind. Moms, you know the routine-you’ve worked a long day, you’re tired, you haven’t got a clue what to make for dinner, and you wish you had a personal chef.

My neighborhood store has a section where you can buy meats with only a day or two until their expiration dates. And a quick peek through the selection led to me some half-price lamb chops-and this recipe.

They were pretty!

They were pretty!

A fricassee (spelled differently in modern times than when this recipe was created, but I have decided to go with the original spelling) is basically any meat cut into chunks and stewed in a sauce or gravy. I have done one fricassee- a Julia Child recipe for chicken-so I was ready to tackle a different cut of meat.

This recipe comes from the cookbook English Housewifery Exemplified in Above Four Hundred and Fifty Receipts Giving Directions for Most Parts of Cookery by Elizabeth Moxon. Again, those old cookbooks with the long, detailed names are so much fun!

It’s a really easy recipe-comes together quickly and makes for a great weeknight dish. It’s very tasty but the flavor is really heightened by seasoning the meat an hour before cooking and letting it set in the refrigerator. It serves three people. We spooned the lamb over french bread and garnished it with lemons.

Ingredients
• 2 six-ounce lamb chops
• ½ teaspoon salt
• ½ teaspoon pepper
• 4 tablespoons butter
• 1 jar brown gravy
• 2 tablespoons of white wine
• ½ teaspoon nutmeg
• ½ jar green olives

Instructions
Slice the meat in to strips about an inch wide.
Sprinkle pepper and salt over meat and rub it in with your hands. Let it marinate at least an hour in your refrigerator if you have the time.

Seasoned with salt and pepper

Seasoned with salt and pepper

In a skillet, melt the butter and add the meat, cooking it just until it is brown. Add the gravy, wine, nutmeg, and flour. Mix thoroughly. Chop the olives and add them.

I may have added a touch more wine than the recipe called for!

I may have added a touch more wine than the recipe called for!

Simmer for about 10 minutes. Serve!

Dinner is served!

Dinner is served!

Jane Austen’s Beef and Stilton Pastie

14 Sunday Jul 2013

Posted by Angela Hursh aka Webmastegirl in appetizers, beef, easy recipes, entrees, Jane Austen recipes, side dishes, Vintage recipes

≈ 4 Comments

Tags

beef, Jane Austen, Jane Austen recipes, pasties, tea recipes

When my daughters and I spent a day last summer at the Jane Austen Festival in Louisville, Kentucky, we took part in an afternoon tea. Besides drinking about three pots of delicious tea between us, we stuffed ourselves with an amazing array of tea-time food-pastries, cookies, and more substantial offerings like Beef and Stilton Pasties.

Menu from the 2012 Jane Austen Festival

Menu from the 2012 Jane Austen Festival

Bonnie Wise, one of the organizers of the festival and a member of the Jane Austen Society of North America, was kind enough to answer a few questions for me via email-and to send me two recipes from that afternoon tea. I saved them for a whole year so I could make them as part of my series leading up to this year’s festivities, now less than one week away!

I had to modify the recipe slightly, due to a mistake I made at the grocery store. The recipe calls for refrigerated pie crust, but I got it into my head that the meat was stuffed into puff pastry! It turned out delicious and I’ve included instructions for using either one, according to your taste.

Bonnie says the recipe is based on one found in Victoria Magazine called TeaTime Bliss. I made this for a weekend lunch and served it with a salad and herbed mash potatoes. It was easy! Big thanks to my 9 year old daughter Elizabeth for helping me in the kitchen-she rolled the pasties and also took some of the photographs you’ll see below!

Ingredients
• 1 tablespoon olive oil
• 1 small onion, chopped
• 1 tablespoons Herbes de Provence (or you can mix your own using thyme, basil, oregano and parsley to suit your taste)
• 1 teaspoon salt
• 1 teaspoon pepper
• 1 pound ground beef or chuck
• ¼ cup crumbled Stilton or other blue cheese
• 1 package refrigerated pie crust or puff pastry
• 1 egg beaten with 1 teaspoon water (for use with pie crust) or 4 tablespoons melted butter (for use with puff pastry)

Instructions
In a medium saucepan, heat olive oil.

I always cry when I chop onions but it's totally worth it!

I always cry when I chop onions but it’s totally worth it!

Add the onions and herbs and cook 3-5 minutes or just until the onions become soft and start to turn clear. I also picked some basil from my garden and ground it with my mortar and pestle and added that to the mixture-I used about two handfuls of leaves.

The ground basil. It smelled so good!

The ground basil. It smelled so good!

Add the beef and cook thoroughly throughout. Drain grease.

Adding the  beef to the mixture

Adding the beef to the mixture

Preheat oven to 350 degrees and line a baking sheet with parchment paper.

If using pie crust: On a lightly floured surface, roll out piecrust to ¼ inch thickness. Using a 3 inch round cutter, cut 24 circles. Lightly brush half the circles with egg wash. These egged halves are where you will put the cheese and meat when that step comes.

If using puff pastry: (NOTE: pull out one roll of pastry 2 hours before you begin this recipe, in order to give it time to thaw at room temperature). Roll out puff pastry on completely clean and dry surface.  Immediately pull two sheets off and cover rest with plastic saran wrap and damp towel. Brush those two sheets of puff pastry lightly with butter.

Puff pastry might seem intimidating to work with but once you get a rhythm down, it's not trouble-and it tastes so good!

Puff pastry might seem intimidating to work with but once you get a rhythm down, it’s not trouble-and it tastes so good!

For either method, once the pie crust or puff pastry is prepared, spoon one teaspoon of blue cheese and two teaspoons of meat mixture onto surface.

Adding meat and cheese to the middle of the puff pastry

Adding meat and cheese to the middle of the puff pastry

For pie crust-cover mixture with circle of pie crust not egg-washed. Crimp edges. Set onto baking sheet and brush with egg wash.

For puff pastry-roll the pastry, beginning on one side and continuing to the other, then fold two edges into middle.

Ella starts by rolling on one end...

Ella starts by rolling on one end…

She's got good rolling skills!

She’s got good rolling skills!

You fold the ends, then flip it over before putting it on the baking sheet.

You fold the ends, then flip it over before putting it on the baking sheet.

Place with the folds down on the baking sheet and brush with butter.  Repeat the whole process, pulling out two more sheets, brushing them with butter and filling theme with meat and cheese.

Bake for 17-25 minutes or until lightly browned. Serve immediately or freeze and rewarm in the oven.

Don't they look yummy?

Don’t they look yummy?

Enjoy!

Greenfield Village Dandelion Stew

27 Saturday Apr 2013

Posted by Angela Hursh aka Webmastegirl in dandelions, entrees, Greenfield Village, Greenfield Village and Henry Ford Museum, soup, vegetables

≈ 1 Comment

Tags

dandelion soup, dandelions, greenfield village, soup

I have been searching for a year and a half for this recipe. It’s one of the dishes our family enjoyed while dining at Greenfield Village in July of 2011, the meal that started this blog. My eldest daughter ordered dandelion soup and we all had a bite and we were all hooked.

So I was ecstatic to stumble across the recipe on Food.com. So happy, in fact, that I ran outside to dig up some weeds before my husband revved the engines of his super-mega huge mower for the first time this spring.

This was my patch.

This was my patch.

This is the perfect example of how historic cooks used what nature gave them to make a meal. In the days before people became obsessed with creating the perfect field of green grass, dandelions had free reign over fields and pasture, hill and valley. And some inventive cook must have looked at all those flower yellow buds and said, hey, I bet that would make a great soup. Kudos to her!

I did a little research before tackling this recipe. First, the entire dandelion plant is edible. Experts suggest you pick wild, free growing dandelions to avoid chemicals and also because dandelions like most of us have, which have been cut repeatedly by mower blades, tend to be more bitter than their wild cousins. But I live in the city and there aren’t a lot of free growing prairies from which to pick the perfect basket of dandelions, so I had to make do with my yard, which is not sprayed for chemicals (much to the chagrin of my neighbors, I’m betting). The blanching step rids the dandelions of their bitterness.

They're healthy and pretty. Don't be afraid of weeds!

They’re healthy and pretty. Don’t be afraid of weeds!

Dandelions are also super healthy. According to the USDA Bulletin #8, “Composition of Foods” (Haytowitz and Matthews 1984), dandelions rank in the top 4 green vegetables in overall nutritional value. Minnich, in “Gardening for Better Nutrition” ranks them, out of all vegetables, including grains, seeds and greens, as tied for 9th best. According to these data, dandelions are nature’s richest green vegetable source of beta-carotene, from which Vitamin A is created, and the third richest source of Vitamin A of all foods, after cod-liver oil and beef liver! They also are particularly rich in fiber, potassium, iron, calcium, magnesium, phosphorus and the B vitamins, thiamine and riboflavin, and are a good source of protein.

So here’s the soup we love-it makes a full pot, enough for several days worth of leftovers for a family of four. It’s really delicious.

If you can’t find any dandelions, you can substitute spinach.

Ingredients
• 1 cup (about 4 regular size) carrots, diced
• 1 medium size onion, diced
• 4 teaspoons dried basil (or 4 tablespoons fresh)
• 2 teaspoons dried oregano (or 2 tablespoons fresh)
• 1 ½ tablespoon cumin
• 1 garlic clove, minced
• 4 tablespoons of butter
• 8 cups of dandelion greens, blanched and chopped
• 8 cups of vegetable or chicken stock
• 1 can corn
• 1 can beans (white or black)
• 1 large potato, peeled and diced
• 2 teaspoons salt
• 2 teaspoons pepper

Instructions

First pick the dandelions! If you can, look for young greens with buds that haven’t bloomed yet. I took a small garden rake, loosened the dirt around the roots, and pulled the plant up entirely. Chop off the roots and KEEP THEM in a plastic bag in a dark and dry place for use in a future blog recipe!

I used almost this whole basket in the recipe.

I used almost this whole basket in the recipe.

Rinse the plants at least twice to remove all the dirt.

"God made dirt, so it don't hurt." But rinse well because dirt in your soup is gross.

“God made dirt, so it don’t hurt.” But rinse well because dirt in your soup is gross.

Then soak the dandelions in cold water for about two hours. (I have no idea what this does, I was just following directions!)

I soaked them in cold water for 2 hours.

I soaked them in cold water for 2 hours.

Start a pot of boiling water. Once it’s at a rolling boil, throw the dandelions in and let them cook for about 15 minutes. Strain them in a colander and let them cool before chopping.

They look like spinach

They look like spinach

In the same pot that you used to blanch the dandelions, melt the butter over medium heat. Saute the carrots, onion, basil, oregano, cumin and garlic for about 5-10 minutes, stirring frequently, or until the vegetables start to get tender.

Add the rest of the ingredients to the pot and bring it to a boil.

Ready to simmer!

Ready to simmer!

Reduce the heat to low and let the whole thing simmer at least an hour or until the potatoes are tender. Correct the seasoning if desired.
Serve and enjoy!

Doesn't it look good?

Doesn’t it look good?

Enjoy!

Enjoy!

Pork Sausage Patties on Fried Mush, ca. 1920

06 Saturday Apr 2013

Posted by Angela Hursh aka Webmastegirl in entrees, old recipes, pork, Vintage recipes

≈ 2 Comments

Tags

corn mush, historical food, main dishes, old recipes, pork sausage, vintage recipes

If you have been reading this blog since I began 18 months ago, you’ll recall that a meal at the Eagle Tavern at Greenfield Village in Dearborn, Michigan was the catalyst for my journey into historic food. That day, I ordered pork sausage patties. They were spicy, thick, and delicious. I love Bob Evans sausage but these vintage babies made commercial sausages look like clay cakes. So when I stumbled across this recipe, I immediately recognized it as an opportunity to recreate that influential meal.

My Eagle Tavern pork sausage was not served over fried mush but this recipe, from Mrs. Wilson’s Cookbook, published in 1920, called for mush and I saw it as a chance to make another staple of the vintage kitchen.

Mush is a basic grain dish created thousands of years ago. It requires water, a heat source, and some corn meal. It’s cooked for a long time over a simmering fire. When I was cooking it, I could imagine prehistoric civilizations using this combination as a simple, inexpensive means of sustenance. In more modern times (think 1700’s and later), the mush was left to gel after cooking, then sliced, pan fried and served with meat or topped with sugar or maple syrup.

Mush is not a staple of the modern kitchen-in fact, I was the only person in my house who had eaten it before. But everyone should try it at least once and you’ll see just how easy it is to make. I got this recipe from The Century Cookbook, published in 1901.

One other note-the sausage portion of this recipe calls for a bread preparation that I still, frankly, do not understand. I did it just to be authentic. I think you can just add bread crumbs instead of going through the trouble of drying out and then re-soaking bread. I often think that some of those vintage cooks did a lot of unnecessary work… and this is one good example.

Ingredients
• 1 pound ground pork
• 2 medium onions, chopped as fine as possible
• Four slices of bread or two whole hamburger buns OR ¾ cup plain bread crumbs
• Two teaspoons salt
• One teaspoon paprika
• Three tablespoons parsley
• ½ cup boiling water
• 1 can tomatoes or two fresh tomatoes, chopped
• 4 cups tap water
• 1 cups corn meal

Instructions
If you’re using bread or buns, set them on a plate the night before and allow them to dry out and get stale.  I used bread and an old hamburger bun that was getting hard anyway.

My bread left out to dry.

My bread left out to dry.

The mush should also be made the day before. In a saucepan, boil the four cups of tap water. Add the corn meal, stirring constantly. Cover, reduce heat to low and cook for one hour stirring frequently to prevent burning.

The cornmeal mush toward the beginning of the cooking process..

The cornmeal mush toward the beginning of the cooking process..

And toward the end. See how it's gumming up?

And toward the end. See how it’s gumming up?

Transfer mush to a bread pan that’s been sprayed with cooking spray. Let it cool, then cover and allow it to sit overnight. When you wake up the next morning, it will have gelled. Turn it onto a cutting board and slice into pieces, ½ to one inch thick.

This is after I left it sit covered overnight.

This is after I left it sit covered overnight.

Fry them in butter until brown, about five minutes on each side. Set aside.

Frying the mush

Soak the stale bread in a bowl of cold water, one slice at a time until soft.

This is where it gets strange.

This is where it gets strange.

Press the water out of the bread.

Yep, that's me, squeezing water out of t he bread.  Why are we doing this again?

Yep, that’s me, squeezing water out of the bread. Why are we doing this again?

Run the bread through a sieve to remove lumps and set aside.

Maybe it makes the sausage patty moist but in this state, the bread does not look very appetizing.

Maybe it makes the sausage patty moist but in this state, the bread does not look very appetizing.

Mix the pork, onions, bread, salt, paprika and parsley in a bowl and form into round patties.

Now we're talking!

Now we’re talking!

Warm a skillet sprayed with cooking spray over medium heat. Roll the sausage patties in flour and brown, about 5 minutes on each side.

And browning!

And browning!

Add ½ cup of boiling water and the tomatoes to the skillet. Cover and let simmer for about a half an hour, until patties are no longer pink. The cooking time will depend on how thick you’ve made your patties.

With the tomatoes

With the tomatoes

To serve, place a few slices of fried mush on your plate and place a pattie on top, then spoon some of the tomato sauce over the whole thing.

MMMM it was very delicious!

MMMM it was very delicious!

Enjoy!

Michigan Pastys, ca. 1943

16 Saturday Mar 2013

Posted by Angela Hursh aka Webmastegirl in beef, entrees, old recipes, pie, pork, pot pie, potatoes, Vintage recipes

≈ 2 Comments

Tags

beef, easy weeknight meals, heritage recipes, historical food, main dishes, pie, potatoes, vintage recipes

When I was in the midst of trying to choose recipes for my vintage dinner party, I received a Facebook message from a high school friend named Mark who shares my love of history, nature, and food. He’s an accomplished cook, gardener, canner and fisherman and his recipes are like little treasures.

Mark included a lovely recipe for pastys. A pasty is basically a pot pie you can carry. I hope he doesn’t mind, but I included his explanation of the history of the pasty because, before this, I’d never heard of them!

Our family had cabins in the UP of Michigan growing up. Whenever we went North, the trip was not complete until we had each had a trifecta of the UP… a beef pasty, a smoked whitefish, and a good hung of maple walnut fudge from Mackinac Island. We stayed in Cadillac, in mid Michigan this year, and I found a store like the ones in the UP when I grew up that sold traditional Pasty (traditional has to have rutabaga), We all had some and my wife said you need to do this, you can do this. The kids love them too. I thought you would enjoy it. They were originally brought to Michigan by the Cornish miners. , I believe. Definitely a hardy filling dish that can be varied depending on what you have around-basically, hardy root vegetables mixed with ground meat in a pastry crust. I have had them with turnips, parsnips, onions, rutabaga, potatoes, sweet potatoes, etc… There is also a way to make these a two course where there is a main meal in two-thirds of it and a desert filling in the last one-third, separated by a wall of dough…I am sure you can do much with this recipe!

Mark included a photo of his batch of pastys-which, by the way, were way prettier than mine-I decided that this would make a great second entrée for the dinner.

Mark’s pastys.

Mark’s recipe comes from the March 28, 1943 edition of the Milwaukee Journal.

Ingredients
• 3 cups flour
• 1 ½ sticks butter, cold and cut into bits
• 3 ½ teaspoon salt, divided
• 6 tablespoons water
• 1 pound round steak, coarsely ground (I used ground chuck)
• 1 pound boneless pork loin, coarsely ground (I used ground pork-Mark used ground rabbit!)
• 5 carrots, chopped
• 2 large onions, chopped
• 2 potatoes, peeled and chopped
• ½ cup rutabaga, chopped (I substituted turnip)
• ½ teaspoon pepper

Instructions

In large bowl, combine flour, butter, and 1 ½ teaspoon of the salt. Blend until well combined and add water, one tablespoon at a time, to form a dough. (I had to add an extra tablespoon).

Dough, just before I formed it into a ball.

Toss mixture until it forms a ball. Knead dough lightly on smooth surface with heel of the hand to distribute the fat evenly. Form into a ball, dust with flour, wrap in wax paper and chill for at least 30 minutes.

Meanwhile, combine meat and vegetables plus remaining salt (2 teaspoons) and pepper in a large bowl.

Hearty goodness!

When the dough is chilled, preheat your oven to 350 degrees. Divide dough into six pieces. Roll each piece into a 10 inch round on a lightly floured surface. Put 1 ½ cups of filling on half of each round.

Ready for sealing!

Moisten the edges and fold over to enclose the vegetables. Pinch the edges together and crimp with fork. Cut several slits in top. Repeat for the other pieces of dough.

It’s a delicate job.

Bake pastys on a lightly buttered baking sheet for 30 minutes. Place 1 teaspoon butter through a slit in each pasty and continue baking for 30 more minutes. Remove from oven, cover with damp tea towel, and cool for 15 minutes.

Not as pretty as Mark’s but still tasty. Mine look rustic… yea, that’s it!

The pastys at the party got rave taste reviews, especially from the guys! Enjoy!

Downton Abbey Salmon Squares with Dill Mayonnaise

12 Saturday Jan 2013

Posted by Angela Hursh aka Webmastegirl in Downton Abbey recipes, entrees, fish, PUdding, seafood, Vintage recipes

≈ 2 Comments

Tags

downton abbey, main dishes, salmon, seafood, Sunday supper, vintage recipes

My life is complete again. Downton Abbey, Season Three, is now airing on PBS and I find myself anxiously counting the days until Sunday when I can get my next fix.

Like most Downton fans, I am deeply invested in the characters. Will Lady Mary and Matthew find everlasting happiness? Will Branson be accepted into the family? Will the Dowager Countess and Mrs. Crawley ever agree on anything? Will Lady Edith be anything more than the Marcia Brady of Edwardian-era England? I tune in each week, longing to know the answers to these questions but also for the exquisite costumes, the GORGEOUS estate, and…. the food.  I’ll admit it. When a dining or kitchen scene is shown, I barely pay attention to the dialogue. My eyes dart through the room for glimpses of the cookware, the serving dishes, the stove, and the pantry. What’s on the sideboard? How are the dishes prepared and presented? This is where my attention is focused. Sorry, Downton writers.

PBS

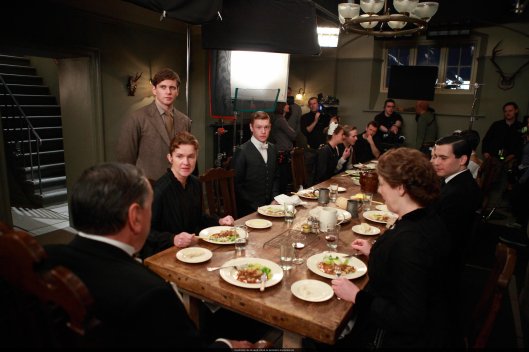
The servants of Downton have their own communal table where they have meals after the family has been served.

On premiere day, I needed something to keep myself occupied or I knew the hours would drag until 9 p.m. So, I made Downton-era food… four recipes, which I’ll be sharing over the course of the next two weekends.

PBS

Fruitcake, anyone?

As we enter Season Three, Downton’s plotline has moved into 1920. I admit, I’m not a fan of this decade. The dresses are formless, the hair is shorn and bobbed, and all I know of 1920’s era food is what I’ve learned from reading F. Scott Fitzgerald, with his description of tomato sandwiches, salad and gin. It always seemed to me that the 1920’s were an era of light food and heavy drinking.

But the 1920’s America of Fitzgerald’s depiction is different than the England of the 1920’s. The people of Great Britain are rebuilding after World War One and the old money families are struggling to maintain their way of life and traditions in a new age where class and upbringing are beginning to be of less importance.

PBS

Mrs. Patmore, Daisy, and new footman Alfred.

I went looking for recipes mainly from the 1920’s to share with you. Three of these come from my fabulous Christmas present cookbook, “Heirloom Cooking with the Brass Sisters.” Marilynn and Sheila Brass are collectors of vintage recipes, both in book form and handwritten, and they date each recipe by decade. The fourth recipe is from the Downton Abbey Cooks blog, which I highly recommend to fellow Downton-lovers.  And for a fabulous article about that blog’s author and the food, the kitchen, and dining room of Downton-real and fictional-click here!

We begin with Salmon Squares. I picked this because it sounded delicious-and also because I imagined it would be a luncheon request of Countess Grantham’s American mother, played by Shirley Maclaine. It’s sophisticated, rich, and presents beautifully. I suggest it for your next Sunday dinner. It is labor intensive-but well worth the effort! It makes nine servings.

PBS

Countess Grantham’s mother, played by Shirley MacClaine.

Ingredients
• 2 cups fine bread crumbs (see note)
• 1 cup milk
• 2 eggs, separated
• 1 cup cooked rice
• 1 cup heavy cream
• 1 14.75 ounce canned salmon
• ¼ cup chopped onion
• 6 tablespoons butter, melted, divided
• 4 ½ tablespoons finely chopped dill, divided
• 1 tablespoon parsley
• 1 teaspoon salt
• ½ teaspoon ground black pepper
• ¼ teaspoon paprika
• 10 Ritz crackers, crushed
• 1 cup mayonnaise
• 2 teaspoons lemon juice
• ½ teaspoon sugar

Instructions

Set the oven rack in the middle position. Preheat the oven to 350 degrees. Coat a 2 quart, 8×11 inch ovenproof glass baking dish with cooking spray. You’ll also need another pan in which to set the baking dish to create a water bath-I used a glass 9×12 inch pan. Set a kettle of water on to boil.

Note: To make fine bread crumbs, toast six slices of bread. Bread into bits and process in a blender, one slice at a time, set on “grind.”
Place bread crumbs in large bowl. Put milk in a microwaveable mug and heat in microwave for about a minute and 15 seconds, until hot but not boiling. Pour hot milk over bread crumbs. Add egg yolks, mix, and set aside.

Bread crumbs, milk and egg yolks

Bread crumbs, milk and egg yolks

In a medium size bowl, combine rice, cream, salmon, onion, 4 tablespoons of the melted butter, 1 ½ tablespoons of the dill, parsley, salt, pepper and paprika. Add to the bread crumb mixture and stir to combine.

The cream, salmon and dill step.  Anytime there is cream in a recipe, you know it's going to be  good.

The cream, salmon and dill step. Anytime there is cream in a recipe, you know it’s going to be good.

Beat egg whites with mixer until soft peaks form. Fold egg whites into salmon mixture and transfer to prepared 8×11 baking dish. Mix the remaining 2 tablespoons melted butter with cracker crumbs and sprinkle over top.

Place 8×11 dish into the larger dish. Pour boiling water into the larger dish until it comes about halfway up the sides of the 8×11 inch dish. Cover the entire thing with foil and place carefully into oven.

This was difficult to illustrate but you can see the 8x11 pan inside the 9x13 pan, which is half filled with water.  So basically, you bake and steam your salmon.

This was difficult to illustrate but you can see the 8×11 pan inside the 9×13 pan, which is half filled with water. So basically, you bake and steam your salmon.

Bake 30 minutes. The recipe says to check the water periodically to make sure it doesn’t evaporate. I didn’t see any water evaporation at all but I use an electric oven and in a gas oven, the water may evaporate-so keep an eye on it. Replenish as needed.

After 30 minutes, remove the foil and bake an additional 30 minutes or until a tester inserted into salmon comes out clean. Remove from oven and the water bath and let the dish cook for about 10 minutes before serving.

Meanwhile, mix the mayonnaise, three tablespoons of the dill, lemon juice, and sugar in a bowl. Cut the salmon into squares and serve with a dollop of the dill mayonnaise. Enjoy!

The salmon squares with the dill mayo, and a little carrots on the side for color.

The salmon squares with the dill mayo, and a little carrots on the side for color.

Haricot of Venison, ca. 1888

04 Sunday Nov 2012

Posted by Angela Hursh aka Webmastegirl in entrees, soup, venison, Vintage recipes

≈ 1 Comment

Tags

easy weeknight meals, historical food, Julia Child, soup, venison, vintage recipes

As we planned the menu for our recent vintage dinner party, my friend Jen said to me, “I’ve got some venison stew meat to use up. Can you make something out of it?”

Of course!

There are only a few vintage recipes for venison stew floating around but I did manage to find this one, which turned out to be really delicious. It includes the addition of red wine to the broth, which is very French and that makes sense, I think, given what I can find out about the author.

The recipe comes from Dressed Game and Poultry a la Mode, published in 1888 by Harriet Ann de Salis. I can’t find any biographical information on de Salis but, the title page of this cookbook lists six previous works by de Salis covering everything from soup to vegetables to 100 ways to cook oysters. The cookbook was published in London, so we can assume de Salis was English. And all her works are “a la mode” so, we can assume her kitchen was heavily influenced by French cuisine.

This recipe made enough soup for 12 people.

Ingredients
• 3 pounds venison stew meat
• 3 tablespoons of butter
• Handful flour
• 2 quarts of homemade stock
• pepper
• salt
• 3 carrots, chopped
• 1 turnip, chopped
• 2 medium potatoes, chopped
• ½ onion, chopped
• 1 7 ounce bottle red cooking wine
• 1 cup of red currant jelly OR whole cranberry sauce

Instructions

Melt butter over medium-low heat in a large soup pot. Place venison in pot and cook until browned.

Sorry Bambi lovers, I thought the venison meat was beautiful compared to beef. It’s dark red and less fatty… and it’s just plain pretty.

Drain fat. Toss handful of flour into pot and mix venison until pieces are covered in flour.

Venison, browned and tossed in flour

Pour stock into pot. Add salt and pepper and bring to a boil. Take pot off heat and allow scum to surface. Scrape it off and discard.

Place pot back onto heat, medium low to low, and add vegetables, wine and jelly or cranberry sauce.

More pretty colors!

If you don’t have “cooking” wine but you have a bottle of red lying around, open it, pour a tall wine glassful and add it to the broth. Then drink the rest with dinner!

Simmer for at least one hour, stirring frequently. If more scum surfaces, scrape it off and discard.

Finished bowl of hearty goodness!

Serve and enjoy!

← Older posts

Recent Posts

  • Easy, No-Sugar Pie Pan Shortcake
  • 9 Vintage Recipes That Will Make You Glad You Live in Modern Times
  • Lemon Chess Pie
  • Julia Child’s Filets de Poisson Bercy aux Champignons (Fish Filets Poached in White Wine with Mushrooms)
  • The Night Before Christmas Movie, ca. 1905.

Archives

  • June 2015
  • March 2015
  • February 2015
  • January 2015
  • December 2014
  • November 2014
  • October 2014
  • September 2014
  • August 2014
  • July 2014
  • June 2014
  • April 2014
  • March 2014
  • February 2014
  • January 2014
  • December 2013
  • November 2013
  • October 2013
  • September 2013
  • August 2013
  • July 2013
  • June 2013
  • May 2013
  • April 2013
  • March 2013
  • February 2013
  • January 2013
  • December 2012
  • November 2012
  • October 2012
  • September 2012
  • August 2012
  • July 2012
  • June 2012
  • May 2012
  • April 2012
  • March 2012
  • February 2012
  • January 2012
  • December 2011

Categories

  • 1950's housewife food
  • appetizers
  • apples
  • apricots
  • bacon
  • bananas
  • beans
  • beef
  • berries
  • Bible
  • biscuits
  • blueberries
  • bread
  • breakfast recipe
  • breakfast recipes
  • brownies
  • cake
  • candied fruit
  • candy
  • carrots
  • Celebrity food
  • cheese
  • Cherries
  • chicken
  • chocolate
  • City Tavern
  • Colonial Williamsburg
  • condiments
  • cookies
  • corn
  • crackers
  • curry
  • dandelions
  • desserts
  • Downton Abbey recipes
  • drinks
  • easy recipes
  • eggplant
  • eggs
  • entrees
  • family recipes
  • fish
  • food
  • Food of the 1930's
  • food of the 1950's
  • Food of the Past Gone Wrong
  • fruit
  • gardening
  • grapes
  • Greenfield Village
  • Greenfield Village and Henry Ford Museum
  • Ham
  • Holiday recipes
  • Ice Cream
  • Jam or preserves
  • Jane Austen recipes
  • Julia Child recipes
  • lamb
  • leftovers
  • Little House on the Prairie recipes
  • Martha Washington recipes
  • meatballs
  • meatloaf
  • Muffins
  • mushrooms
  • No bake cookies
  • nuts
  • old recipes
  • onions
  • oranges
  • pancakes
  • parties
  • Peanut butter
  • pie
  • pork
  • pot pie
  • potatoes
  • PUdding
  • pumpkin
  • rabbit
  • Recipes
  • salad
  • sauces
  • sausage
  • seafood
  • side dishes
  • soup
  • strawberries
  • Tea recipes
  • Tudor Era
  • turkey
  • Uncategorized
  • vegetables
  • venison
  • Vintage recipes

Meta

  • Register
  • Log in
  • Entries RSS
  • Comments RSS
  • WordPress.com
Advertisements

Blog at WordPress.com.

Cancel
Privacy & Cookies: This site uses cookies. By continuing to use this website, you agree to their use.
To find out more, including how to control cookies, see here: Cookie Policy